Pages
August 25, 2010
Daughters of History Paperdolls Giveaway!
Emily Rose is giving away a set of the paper dolls that she and her sister have created. These paper dolls are very beautiful and come with biographical sketches of the women of history they represent.
August 17, 2010
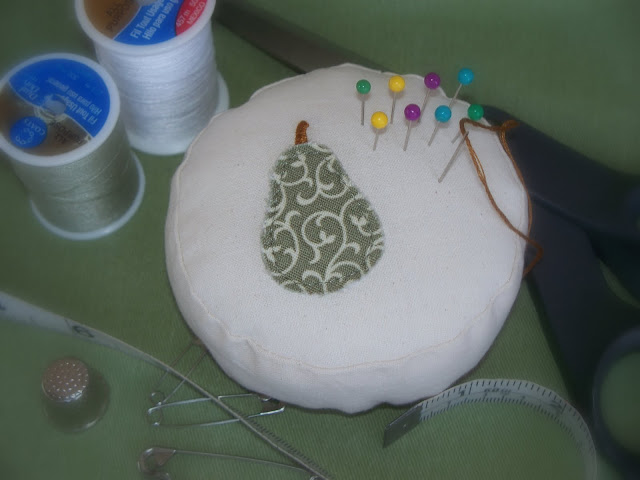
Tuorial: Pear Pincushion
I have been sewing for around eight years, but never had my own pincushion. So today I decided I should make one. The pear adds a nice decoration to the cushion, but there is still plenty of room for pins and needles.
Materials:
- muslin
- cotton print
- fusible interfacing
- embroidery floss
- polyester stuffing
Note: all seam allowances are 1/4" wide
1. Cut out two circles from the muslin 4 inches in diameter and a strip 12 inches by 1 3/4 inches.
2. Draw a small pear and cut it out of the cotton fabric. If you need help try searching "pear outline" on google images and find one to copy. Also cut out a pear from the interfacing and fuse it to the back of the cotton.
3. Pin the pear onto one of the muslin circles. Sew close to the edge around the pear. If you don't care for the raw edges you could zig zag around the pear instead.
5. Fold the muslin strip in half and stitch to make a band. Press seam open.
6. Make small snips with scissors around the top and bottom of the band about 3/8 inch apart.
7. With right sides together pin the top of the pincushion to the band and stitch. Repeat for bottom leaving a small opening for stuffing. Clip seams. Turn right side out.
8. Stuff the pincushion.
9. Stitch the opening shut with a blind stitch.
Enjoy!


August 12, 2010
Great Find
Usually I don't find any nice fabric on the $1/yard table at Wal-Mart, but it still pays to check because every once in a while something like this will pop up:
- Five yards of gray jersey knit = $5
- Five yards of gray and white striped jersey knit = $5
- Five yards of brown eyelet knit = $5
- 10 yards of sage green gathered knit = $10
Serendipity!
I plan to use some of this fabric to experiment making some shirts and dresses I've been thinking about. I love $1/yd fabric!
August 10, 2010
Tutorial: Elsie's Owl

When I heard that my sister had a baby girl I was so excited to start sewing for her! I enjoyed designing and sewing this owl softie which will go nicely in Elsie's nature themed nursery.
Here's how to make your own owl.
You will need:
corduroy fabric
cotton fabric
several colors of felt
embroidery floss
stuffing
ribbon
sewing machine
1. Draw simple owl and wing shapes for your pattern.
2. Fold the corduroy with right sides together, pin on owl pattern and cut out.
Fold cotton fabric with right sides together, pin on wing pattern and cut out.
3. Pin the wings to the front of the owl and zig zag. Iron to smooth the fabric.
4. Cut two circles out of cream felt and two smaller circles out of brown felt for the eyes. Cut a small diamond out of orange felt for the beak.
5. Cut out an oval of orange felt and then cut it in
half for the owl's feet.
6. Position the eyes, beak and feet onto the owl . Pin them on and hand sew with three strands of embroidery floss using a running stitch.
7. With right sides together pin front of owl to back and sew on the machine with a 1/4 inch seam allowance, making sure you leave a small opening.
8. Clip the seam to stitching all the way around.
9. Turn the owl right side out. Poke a pencil in the ears to make them pointy.
10. Stuff the owl and sew the opening closed using a blind stitch.
11. Using pink ribbon, tie a bow and sew it onto the owl's ear.
12. Give the owl to your favorite little girl!
Hello!
My name is Alison. I love making my own patterns and trying to recreate things I see in magazines or at the store. I also enjoy repurposing gently used clothing into something new for a very small cost. I started this blog to share my projects and ideas and hopefully give a little inspiration for your own!
Subscribe to:
Comments (Atom)


