Pages

December 27, 2011

Tin can pencil holder

When I was little I made pencil holders out of toilet paper rolls. Now that I'm grown up I make them out of tin cans!


The instructions:
  • Cut a piece of fabric about an inch taller than your tin can and wide enough to wrap around it.
  • Glue the fabric around the can, centering the can.
  • Tuck under the fabric at the top and bottom of the can and glue down.
  • Cut out a piece of lace or coordinating fabric and glue on top.

December 17, 2011

A new outfit

I made this outfit for Hip Chick Clothing. I love the jacket - I almost hate to send it away!


flower appliques

the jacket is reversible

gold lace bows

December 16, 2011

An autumn evening

From the rising of the sun
unto the going down of the same 
the Lord's name 
is to be praised.


sharing this post on Finding Beauty in the Ordinary.

December 15, 2011

Pumpkin muffins

I was not able to do my Finding Beauty in the Ordinary post yesterday, but I hope to continue for the rest of the week.

Yesterday I made pumpkin muffins. They are delicious and very healthy. I found the recipe here. I was looking for a recipe that didn't call for any sugar and was excited to find this recipe that not only doesn't include sugar, but also uses spelt and oat flours which do not turn to sugar as fast as wheat. I did add a little Truvia. They smell so good while they are baking!

I changed a few things in the recipe so this is how I made them.

Spelt Pumpkin Muffins

1 1/2 cups spelt flour
1/2 cup oat flour (I didn't have any oat flour, so I just ground some oats in a food processor)
1 tsp. baking powder
3/4 tsp. baking soda
1/2 tsp. salt
1 tsp. cinnamon
1/2 tsp. pumpkin pie spice
1 tbsp. Truvia

2 eggs
1/4 cup melted butter, cooled (you can use oil)
3/4 cup yoghurt
1/4 rice milk (the original recipe calls for water, but I like to use rice milk to add a little sweetness)

Mix together the dry ingredients. In another bowl, whisk together the wet ingredients. 
Mix the dry ingredients into the wet ingredients quickly and lightly with just a few strokes.
Put into greased muffin tins. 
Bake at 155* for at least 20 minutes, or until toothpick comes out clean and muffins are fragrant.
Recipe yields about 16 small muffins.

December 13, 2011

Yellow.

 I love color! I can spend a looong time in the paint department. I picked up a bunch of paint chips to choose a color for a headboard some friends gave me. I knew I wanted a yellowish gold, so I got many of the chips the store had in the yellow family. I have my choice narrowed down to two similar shades, but it's hard to decide! I will post a picture of the headboard after I paint it.


 If you love color too you should definitely check out this website called Design Seeds where they post beautiful palette combinations every day. It's my new favorite!

sharing this post on Finding Beauty in the Ordinary.

December 12, 2011

Vintage

Emily, from Feathering the Nest started a daily photo project for the month of December called Finding Beauty in the Ordinary. This week I am planning to join her!

Today I decided to post some pictures of a few vintage items in my room. I enjoy vintage things especially if it's something that belonged to a family member.

[ This brass colander was given to my parents as a wedding gift. I know it really belongs in the kitchen, but I keep a knitting project I'm working on in it! ]

[ This candy dish belonged to my Father's grandmother. He remembers getting mints out of it when he was a boy. :) ]

 [ I love the acorn knob! ]

[ The copy of Pilgrim's Progress also belonged to my Great Grandmother. ]

[ Abigail and I recently bought this chair at a garage sale. It's nice and comfortable! We call it "the throne". ]

December 8, 2011

Felt heart bookmarks

Isn't this the cutest thing? Probably the easiest as well! All you do is cut out two felt hearts, sew them together and you have a bookmark. They make great gifts.


Here are my felt heart bookmarks. I thought it would be fun to add some embroidery, so I added a lazy daisy and a circle of running stitch to each one.


Update:  You can now download a free pattern for these bookmarks by clicking on the image below! Also, read more details in this post.


linking here:

December 1, 2011

Refashion friday: purple jersey skirt


I found this maternity dress for my sister at a garage sale and it turned out she already had one exactly like it! So she said I could keep it to make something with.


I took the bodice off the dress and then took off the first tier of the skirt. Out of that tier I cut a yoga-style waistband. I followed these instructions, only mine doesn't fold over because I didn't have enough fabric. Then I gathered the skirt and stitched my waistband onto it. It is definitely my most comfortable skirt!


November 7, 2011

Tutorial: 3 dimensional pumpkin felt art


I think autumn decorations must be my very favorite to make. Maybe that's because of the beautiful color scheme of the season. I am soaking up all the glowing reds, burnt oranges, mustard yellows, chocolatey browns. 

This give thanks/pumpkin picture was really fun to make. I've been itching to try it after thinking of it a couple weeks ago and I'm happy it turned out like I imagined. Cause that doesn't always happen, you know. ;)
All you need to make your own picture is some felt, embroidery floss and a picture frame.

  • First cut a piece of felt to fit in your picture frame.

  • Cut six pumpkin shapes out of orange felt. Yes, six pumpkin shapes. I wasn't sure how many I would need so I cut out eight. sorry!

  • Take one shape and fold it in half. 

  • Place a line of hot glue down the fold.

  • Stick it on the center of the sheet of felt.

  • Continue gluing the shapes on either side of your first one until all are used.
  • Cut a small circle out of green felt.
  • Cut a spiral.
  • Glue the center of the spiral above the pumpkin. Trim if necessary.
  • Cut out a stem out of brown felt and stitch on. 
  • Embroider a sentiment below the pumpkin and frame. Make sure to take the glass out of the picture frame!
 
  • Enjoy! 


Creative Itch


October 11, 2011

Scarf Season

Well, it's finally getting to be a little chilly in the mornings and evenings here in Texas. I am so ready to get out my scarves and sweaters, aren't you? Here are some cute scarf tutorials that I found. Scarves are very easy to make and usually do not take a lot of fabric.


Infinity scarves and wraps are my favorite this fall, but these straight scarves are really beautiful. 


This diagram has many fun ways to tie your scarves. I especially like #5 and #6.

September 16, 2011

Refashion Friday: another dress to skirt

Here is a quick refashion I did the other night. 

I took the top off this dress,


sewed the waistband back together and added a zipper to the opening in the back.

I love the pattern around the hem.


Perfect to wear this fall!


Have you done any refashioning lately?

linking here:
friday fun finds
weekend wrap up party 

September 8, 2011

Meet Amelia...

Abigail and I were given this decorative dress form and our friend helped name her.

I think she's so cute!

She is always willing to model,

and matches our room perfectly.

August 23, 2011

Tie it in a bow tutorial

Get ready to pull out your small scraps of fabric! I have been saving a tiny bit of this floral print and a bow seemed the perfect thing to make.

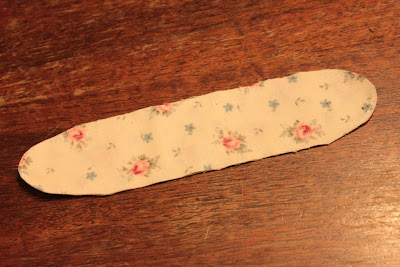
First, cut out two strips of fabric (mine were 8 in. by 1 1/2 in.). Taper the ends.

Sew the strips right sides together leaving an opening 1 1/2 in. or so to turn it right side out. Trim the seam allowances at the ends of the strips to 1/8 in.

 Turn it right side out. Press. Stitch the hole closed.


Tie in a knot!

You can slip it onto a headband,

or if you want something different the next day slide a hair clip on the back.
Happy hair bow wearing. :)

 linking here
kojodesigns